Building a portfolio website in Positron
2025-11-05
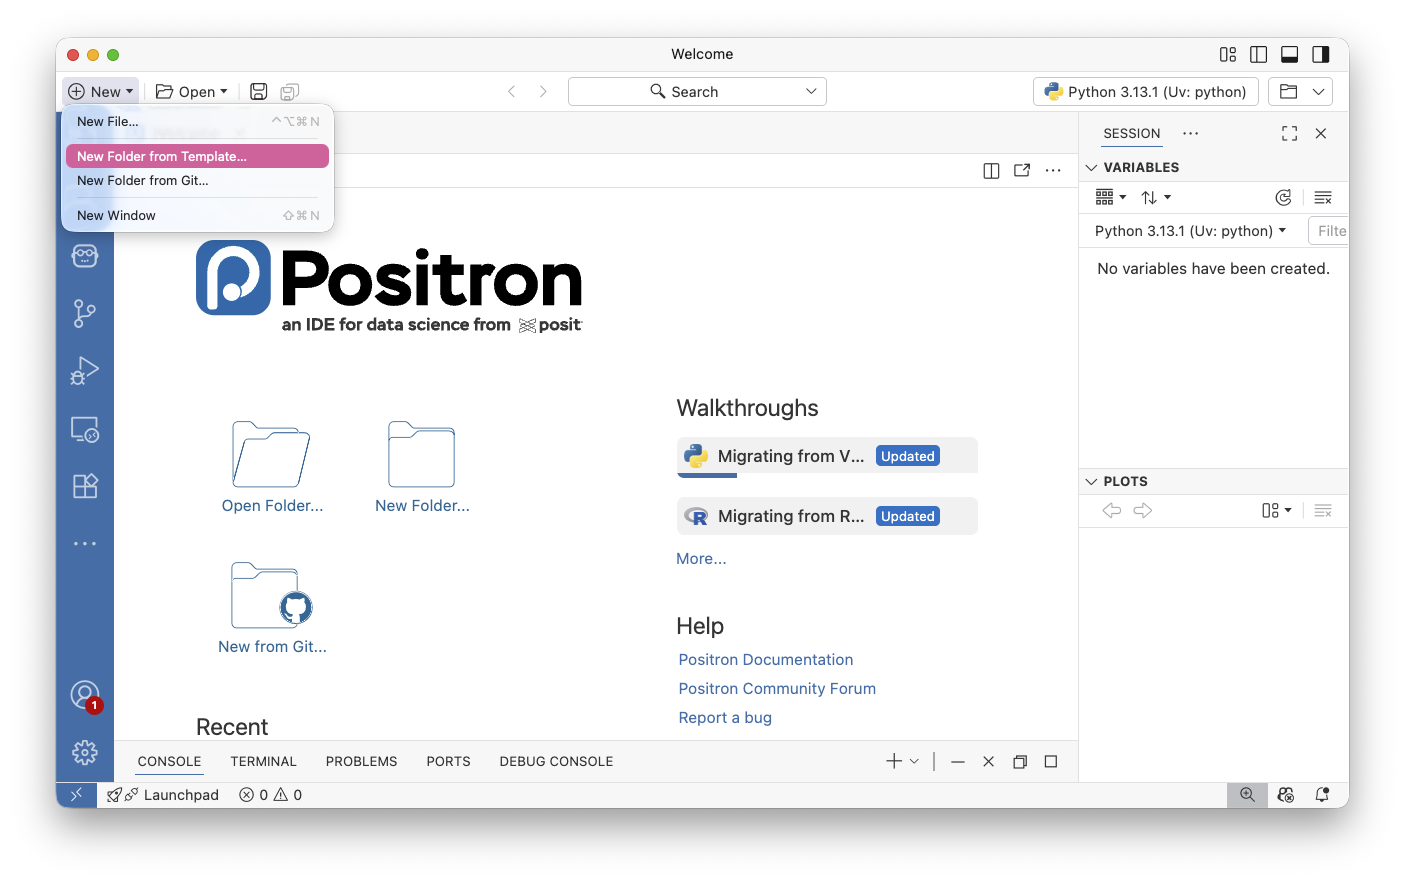
Create new folder from template
- Creating a new folder, or directory, to organize our files
- Self-contained
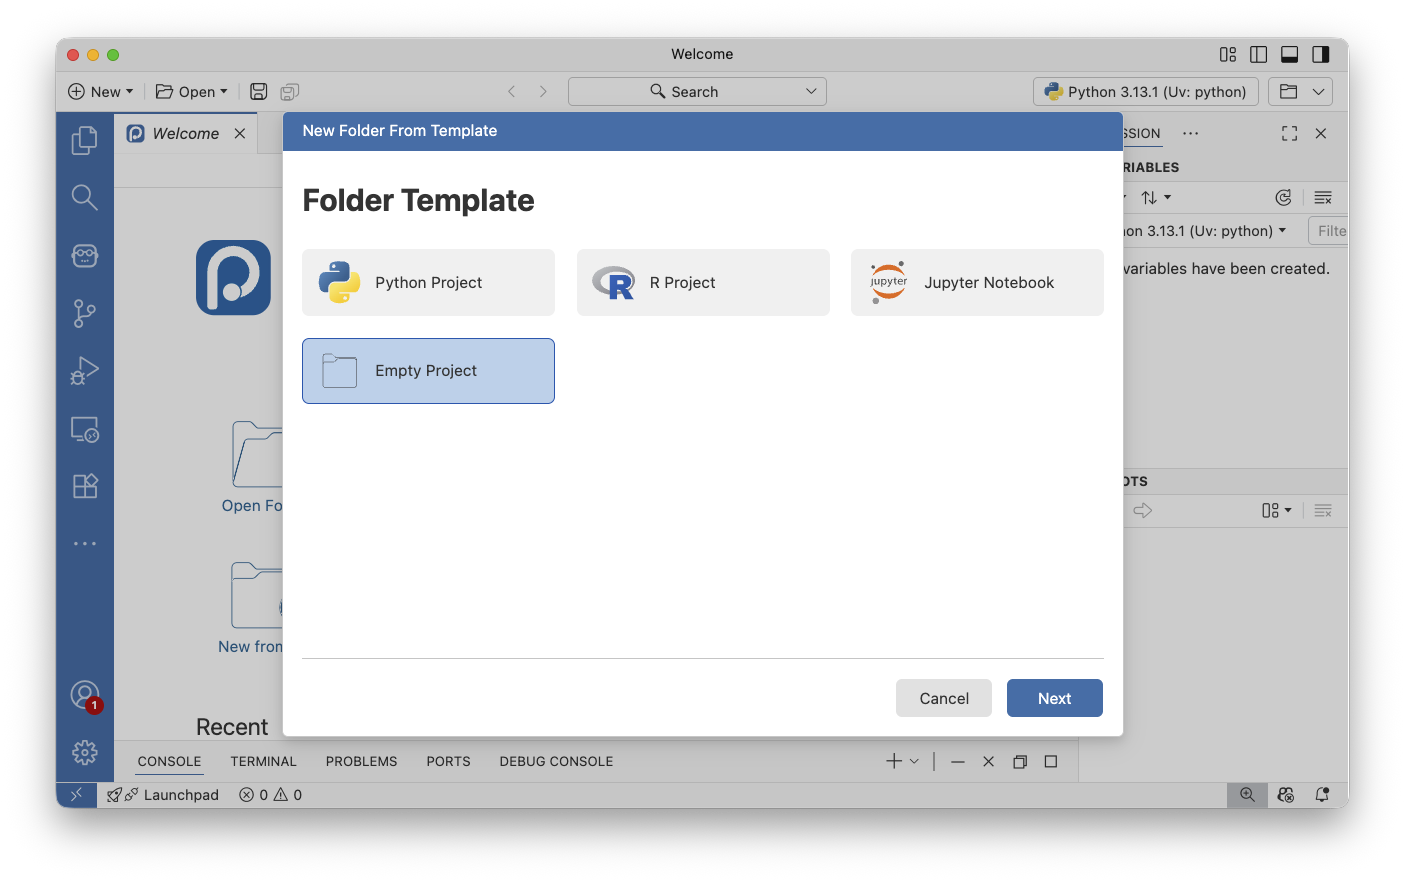
Choose empty project
- We can add Python or R code later, let’s just start with something basic
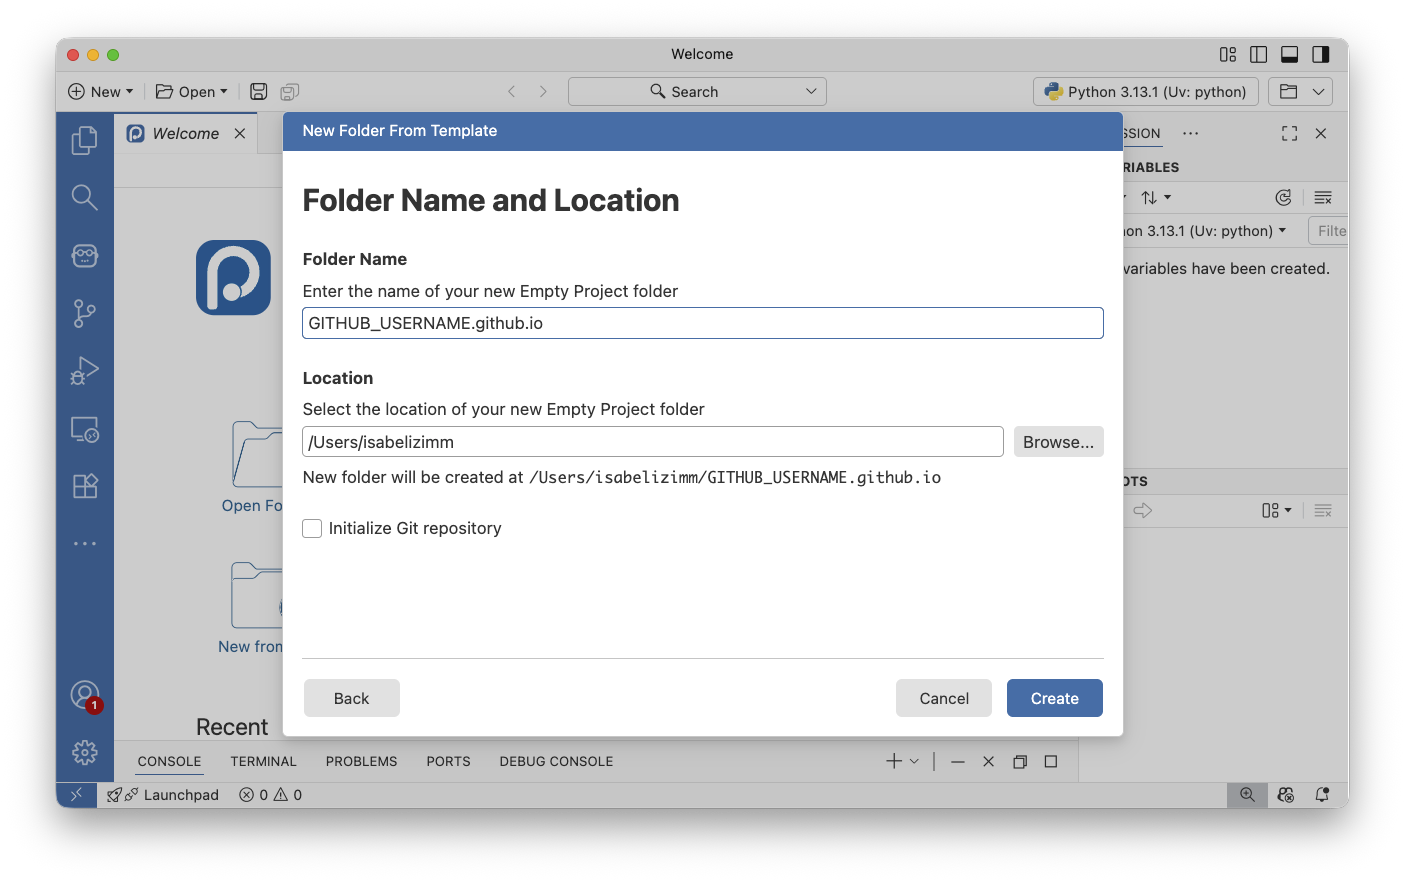
Name your folder
- If you have a GitHub username, make this folder named
GITHUB-USERNAME.github.io
View new folder

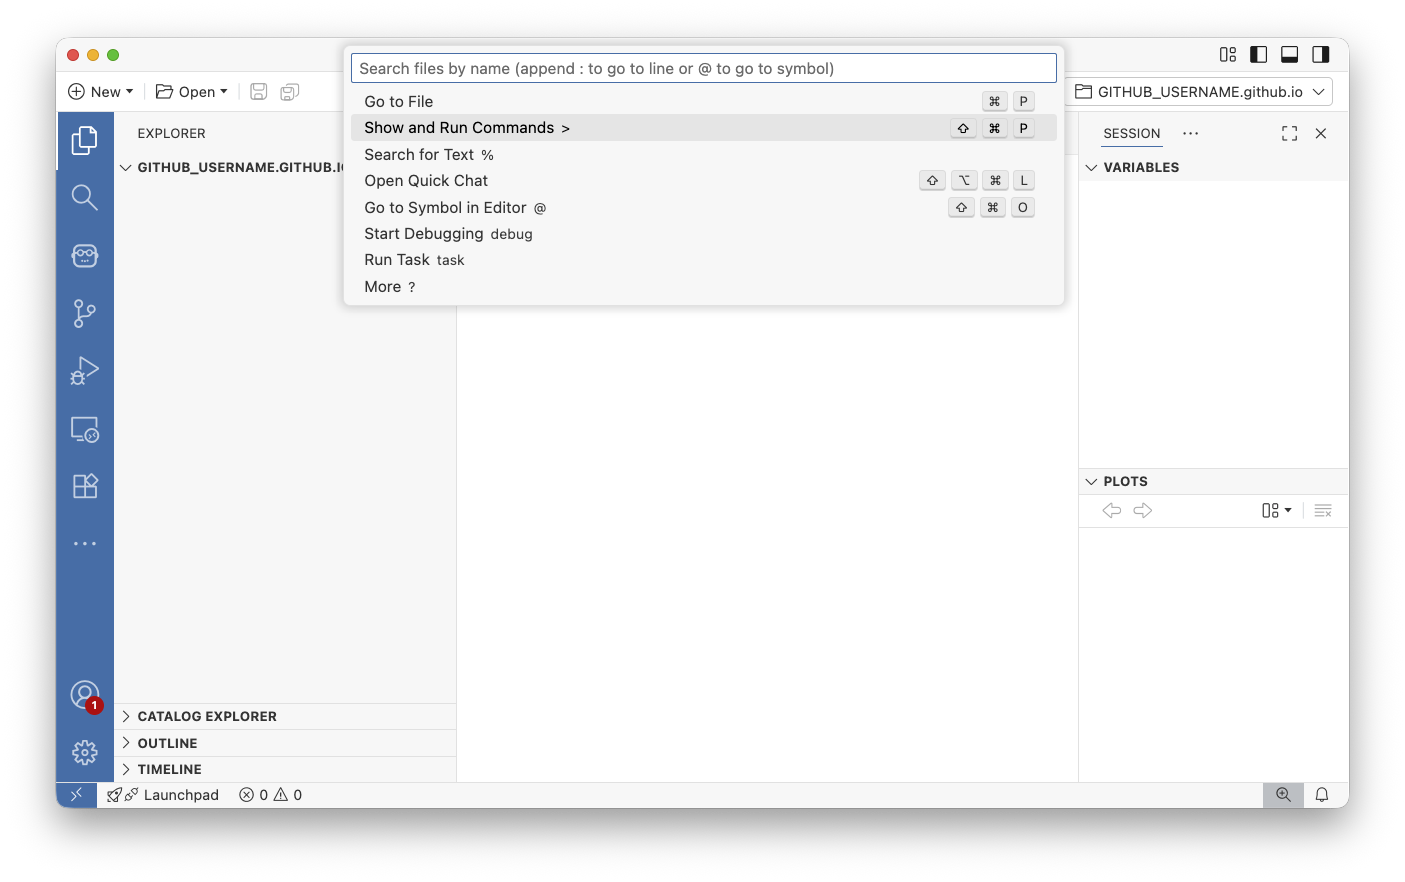
Click on “Search bar at the top”
- Go to
Show and Run Commands
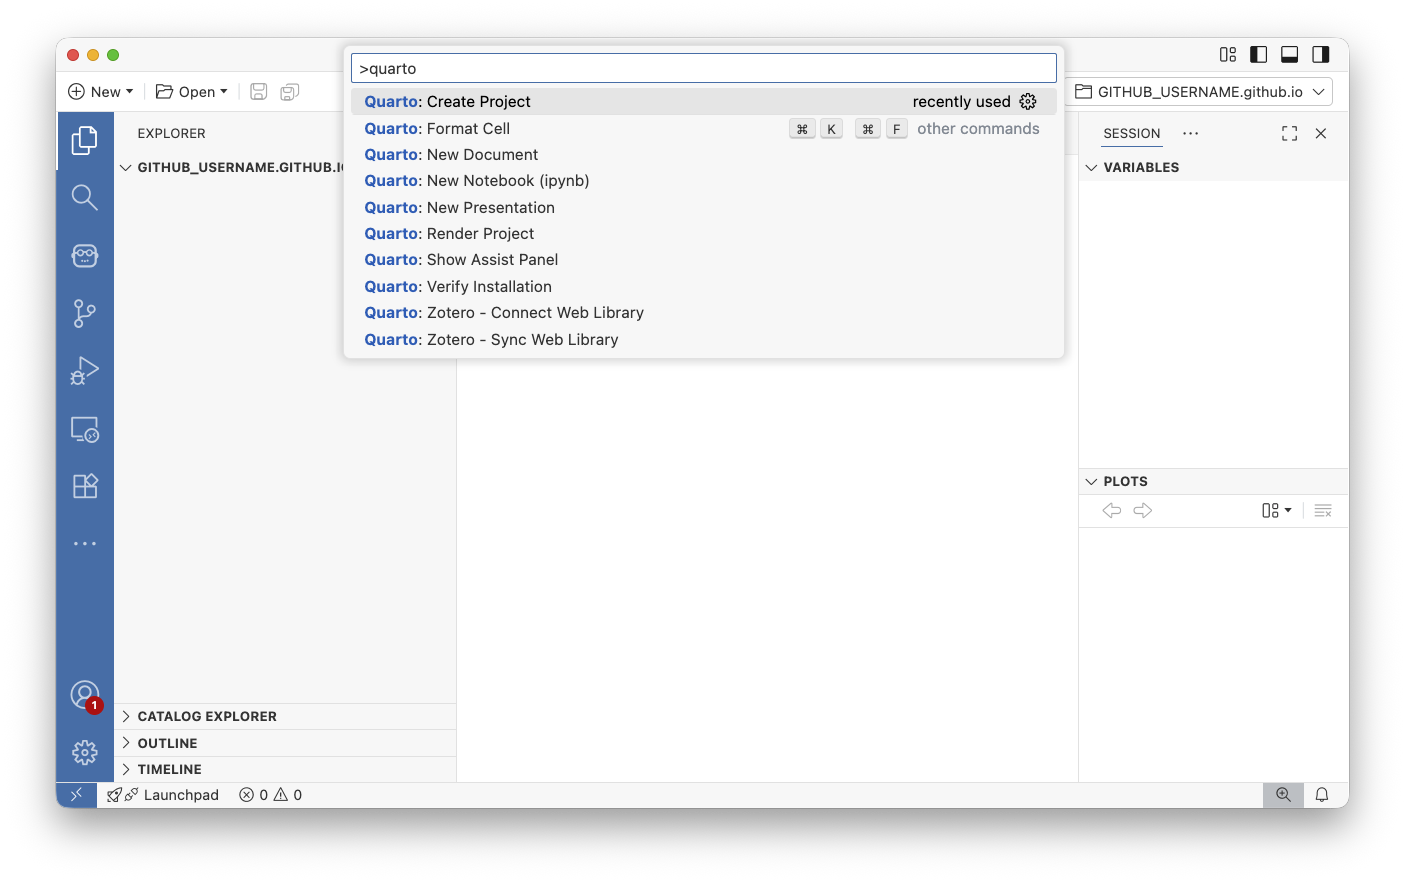
Run Quarto: Create Project
- In the quickpick, type
Quarto: Create Projectand select this project
Create Blog Project
- You can choose the website or blog option. If you think you’ll want to add a portfolio of your work, a blog is a great choice.
- This doesn’t lock you in forever. You can transition a blog into a website, or vice-versa later.

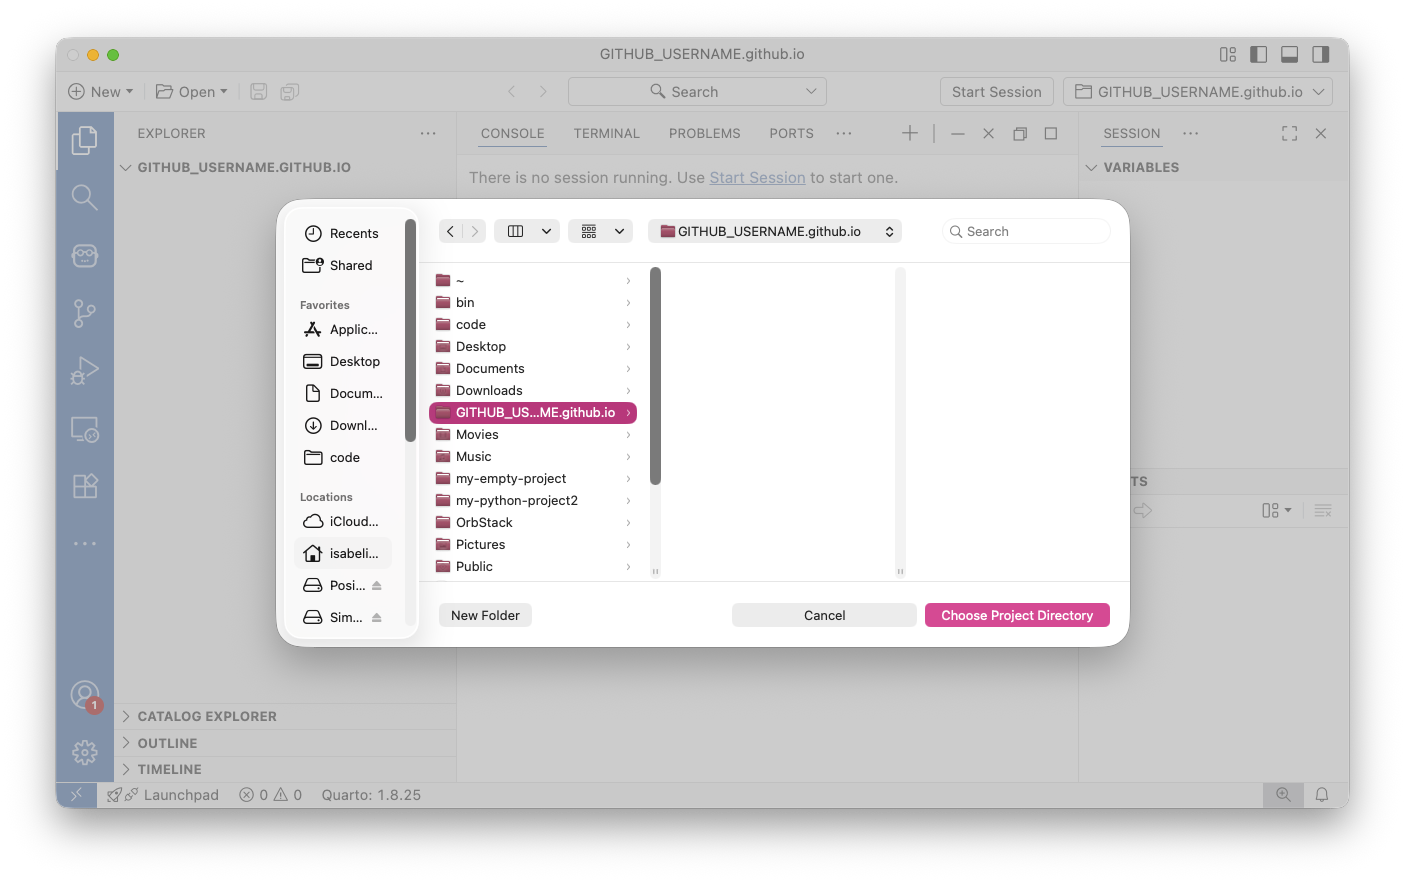
Choose you GITHUB-USERNAME.github.io directory
- Select the folder you made earlier, named
GITHUB-USERNAME.github.io
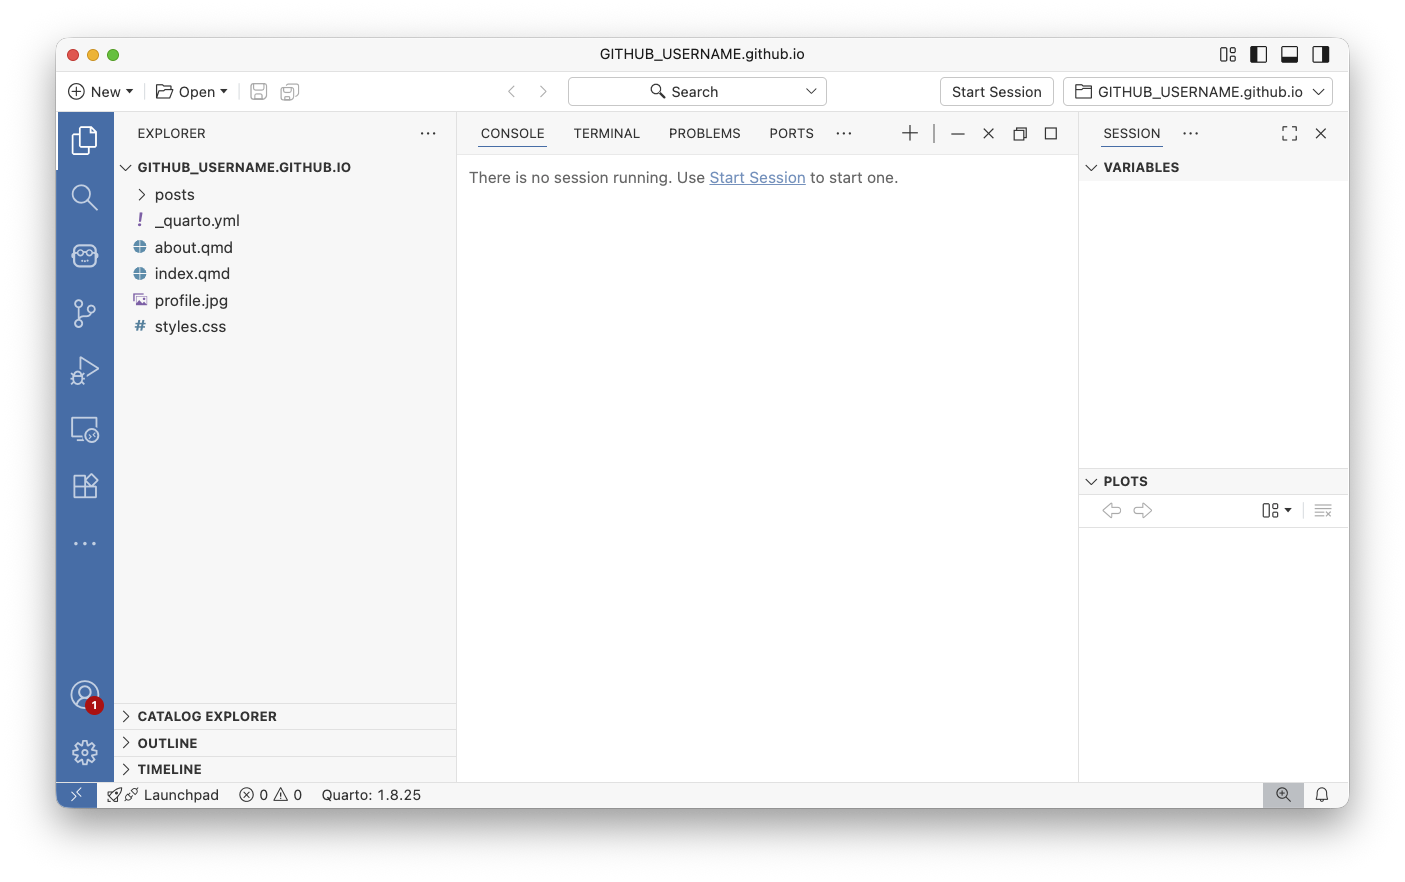
See your beautiful blog!
- Explore these files.
_quarto.ymlis the core configuration file of your website.- Anything ending in
*.qmdis a Quarto Markdown file. - Go to a
*.qmdfile and pressing thePreviewbutton to view your site!
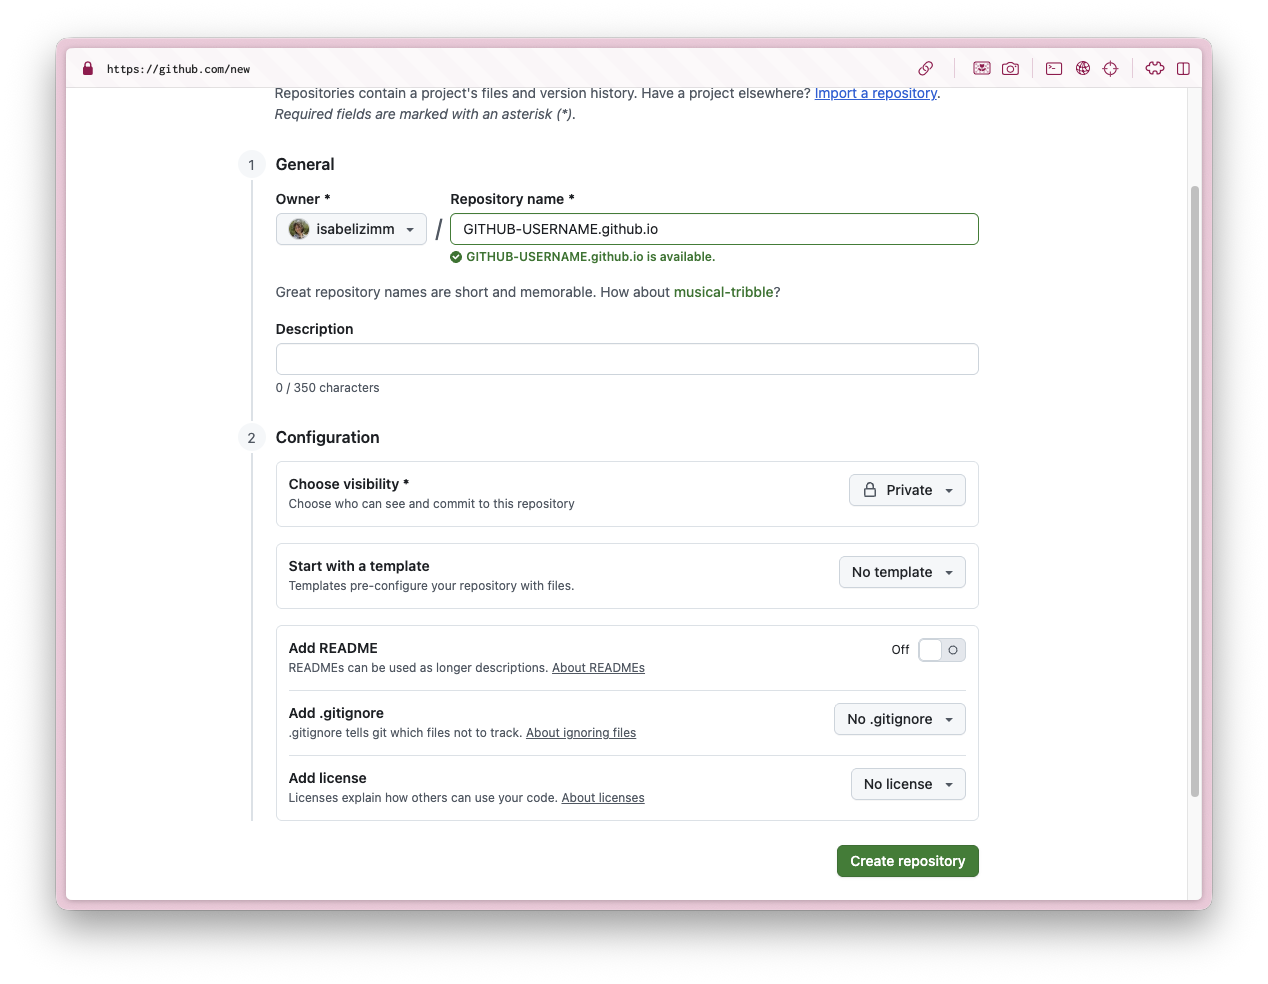
Create repository for your blog
- GitHub only (skip if quartopub)
- Create a new repository with the name:
your-username.github.io
Copy command from GitHub
- GitHub only (skip if quartopub)
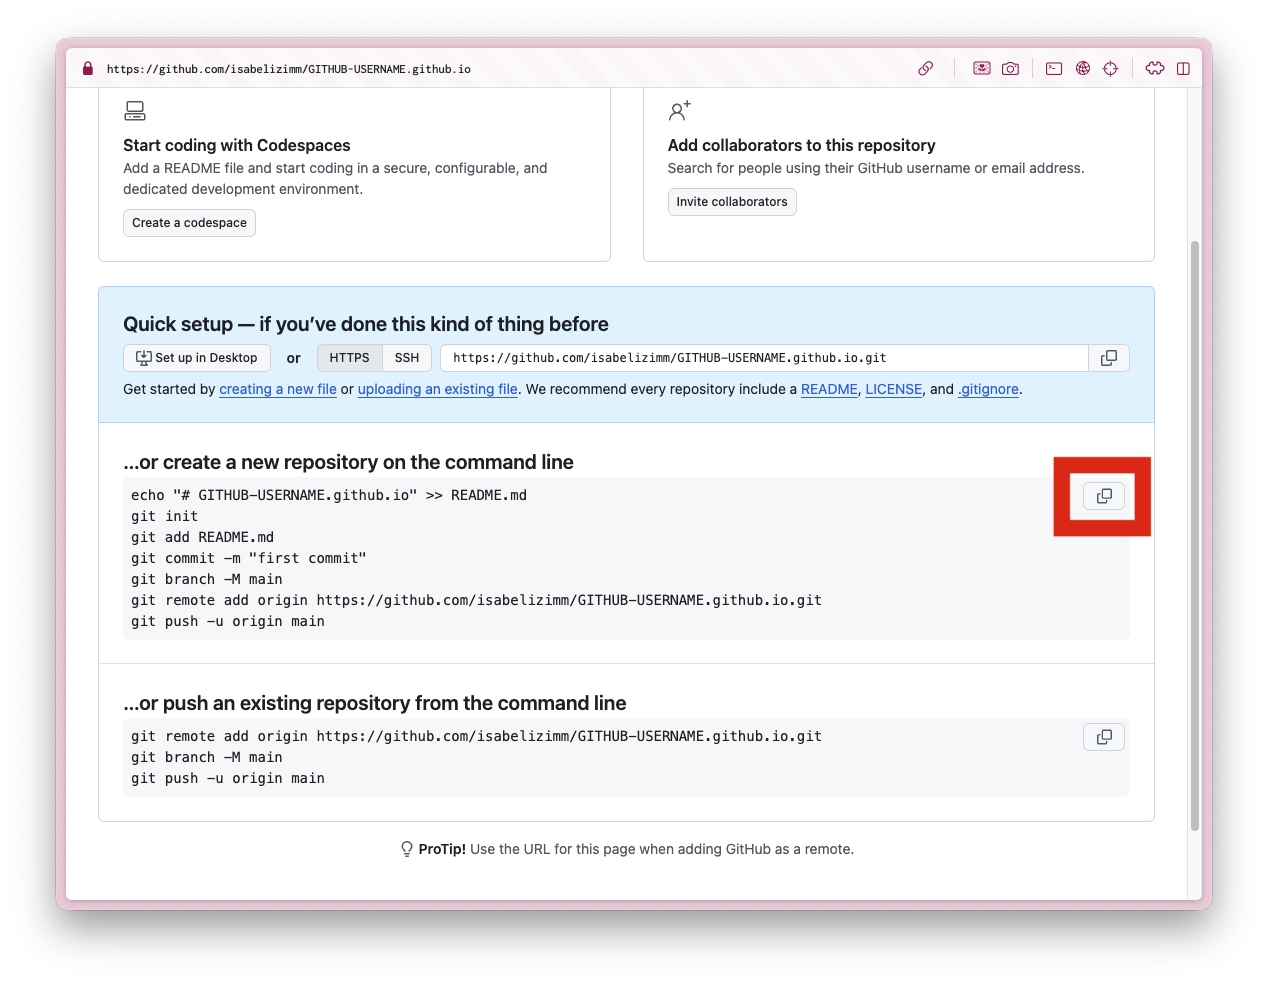
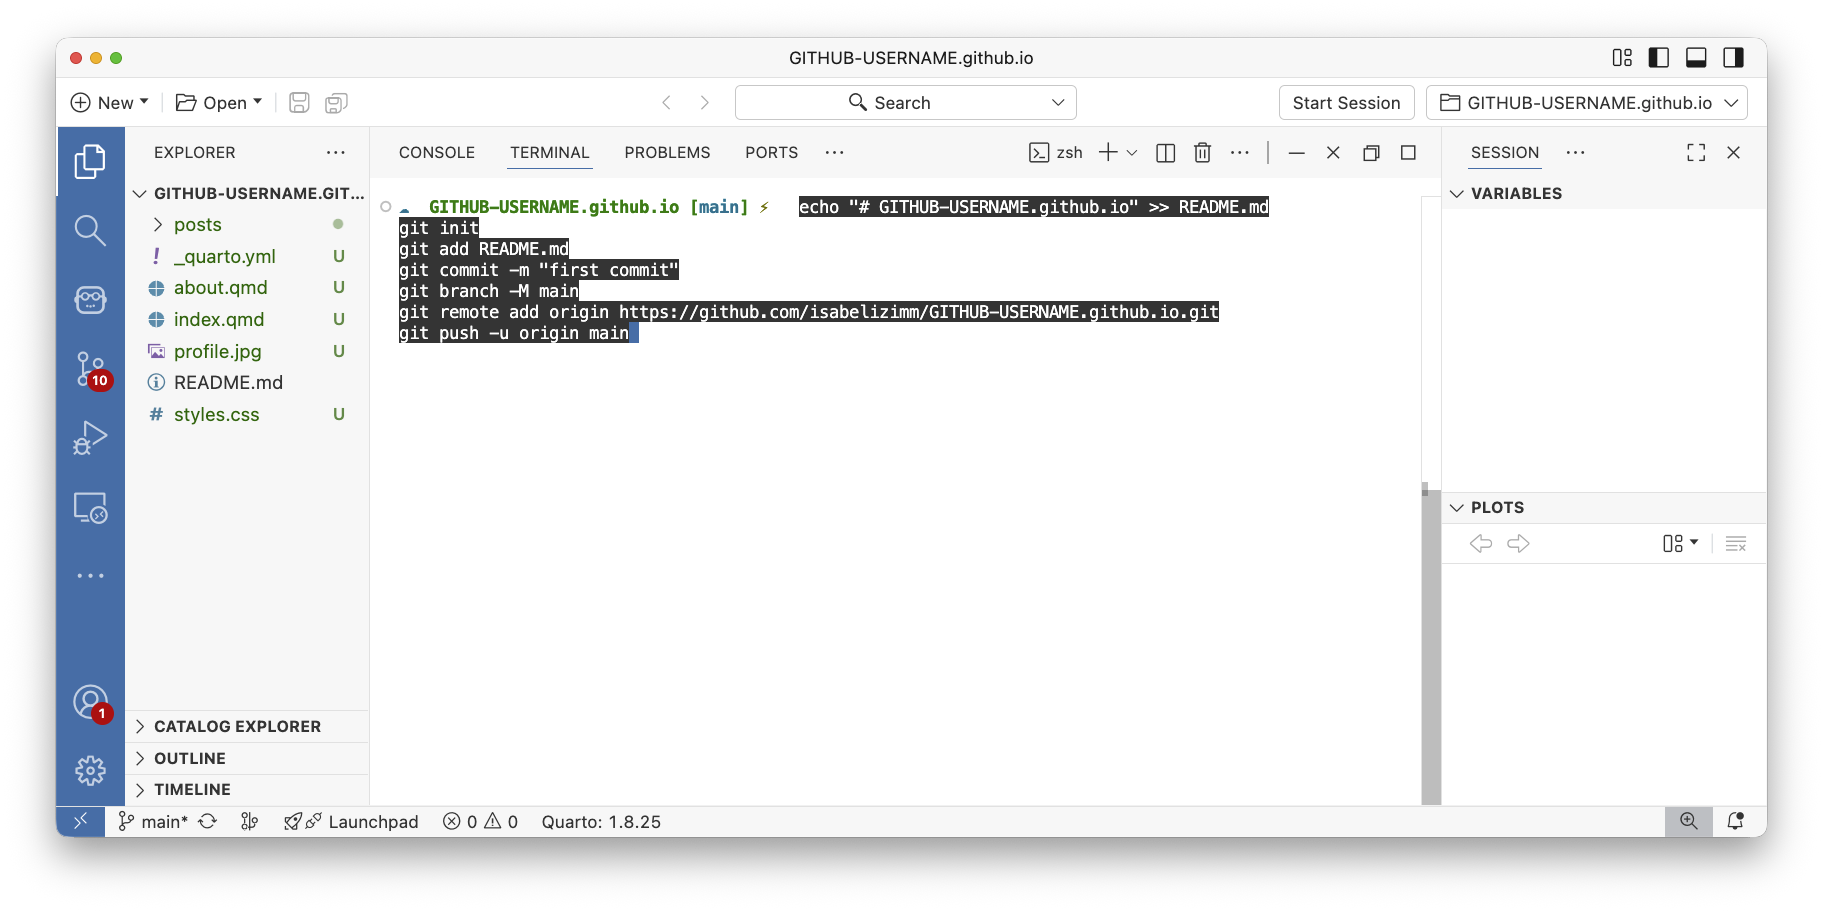
Paste command in terminal
- GitHub only (skip if quartopub)
- Make sure you are in the TERMINAL tab, not the CONSOLE tab
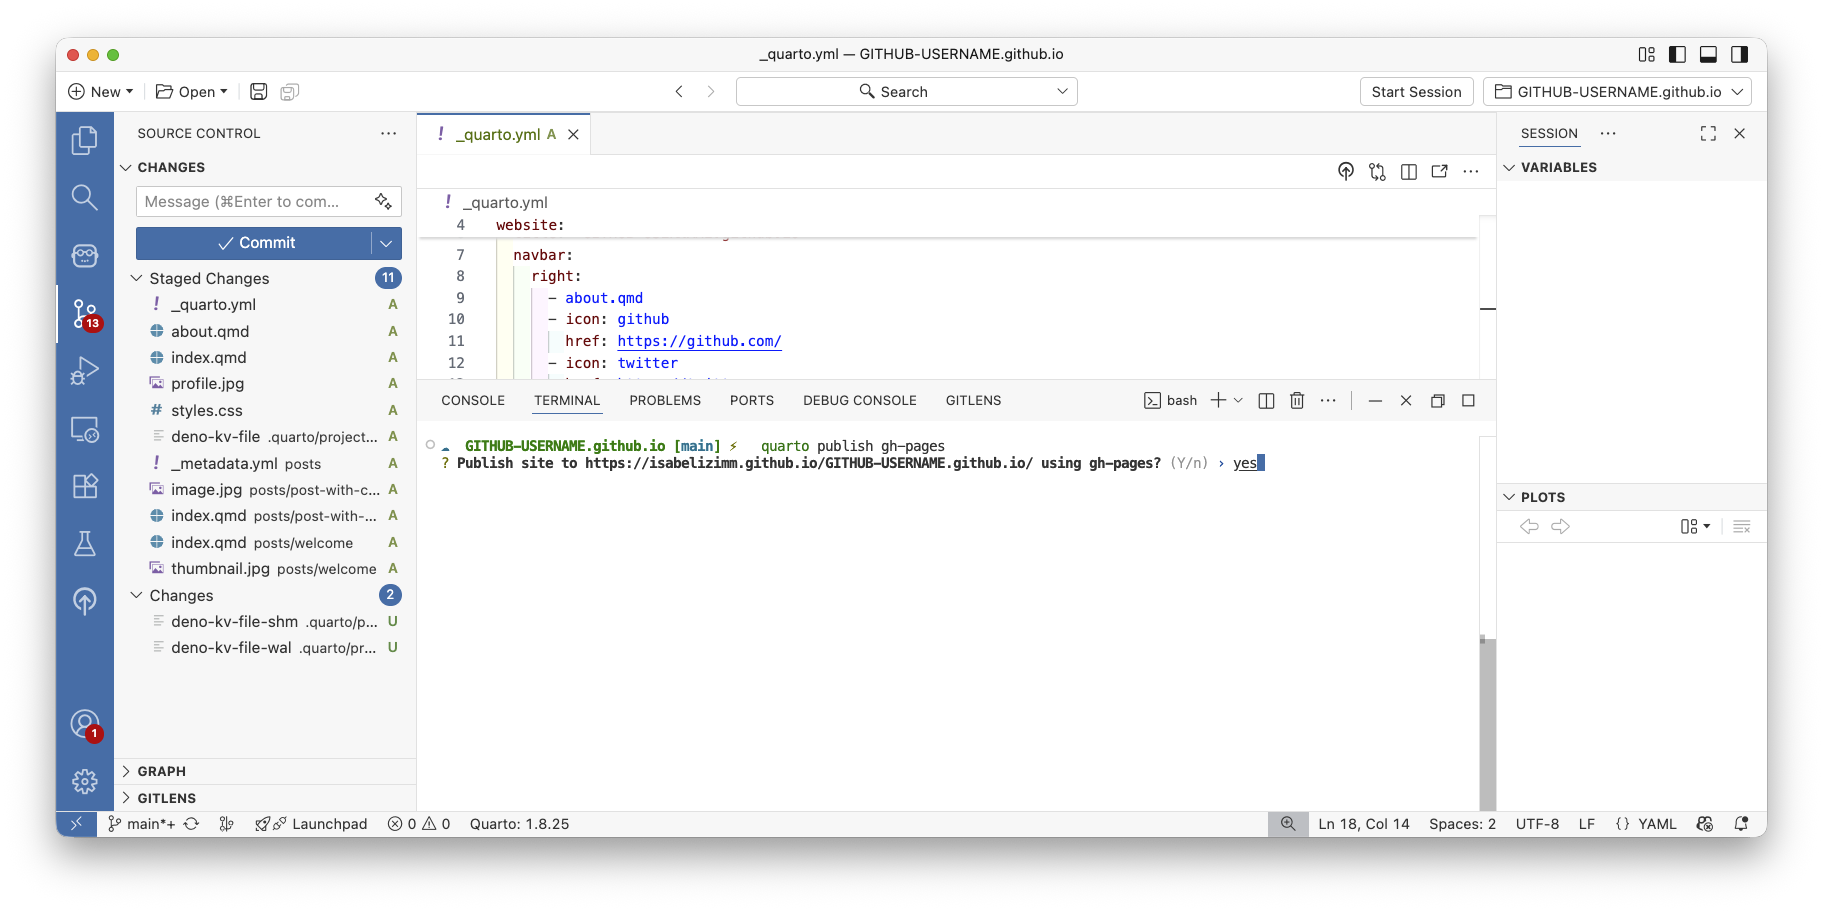
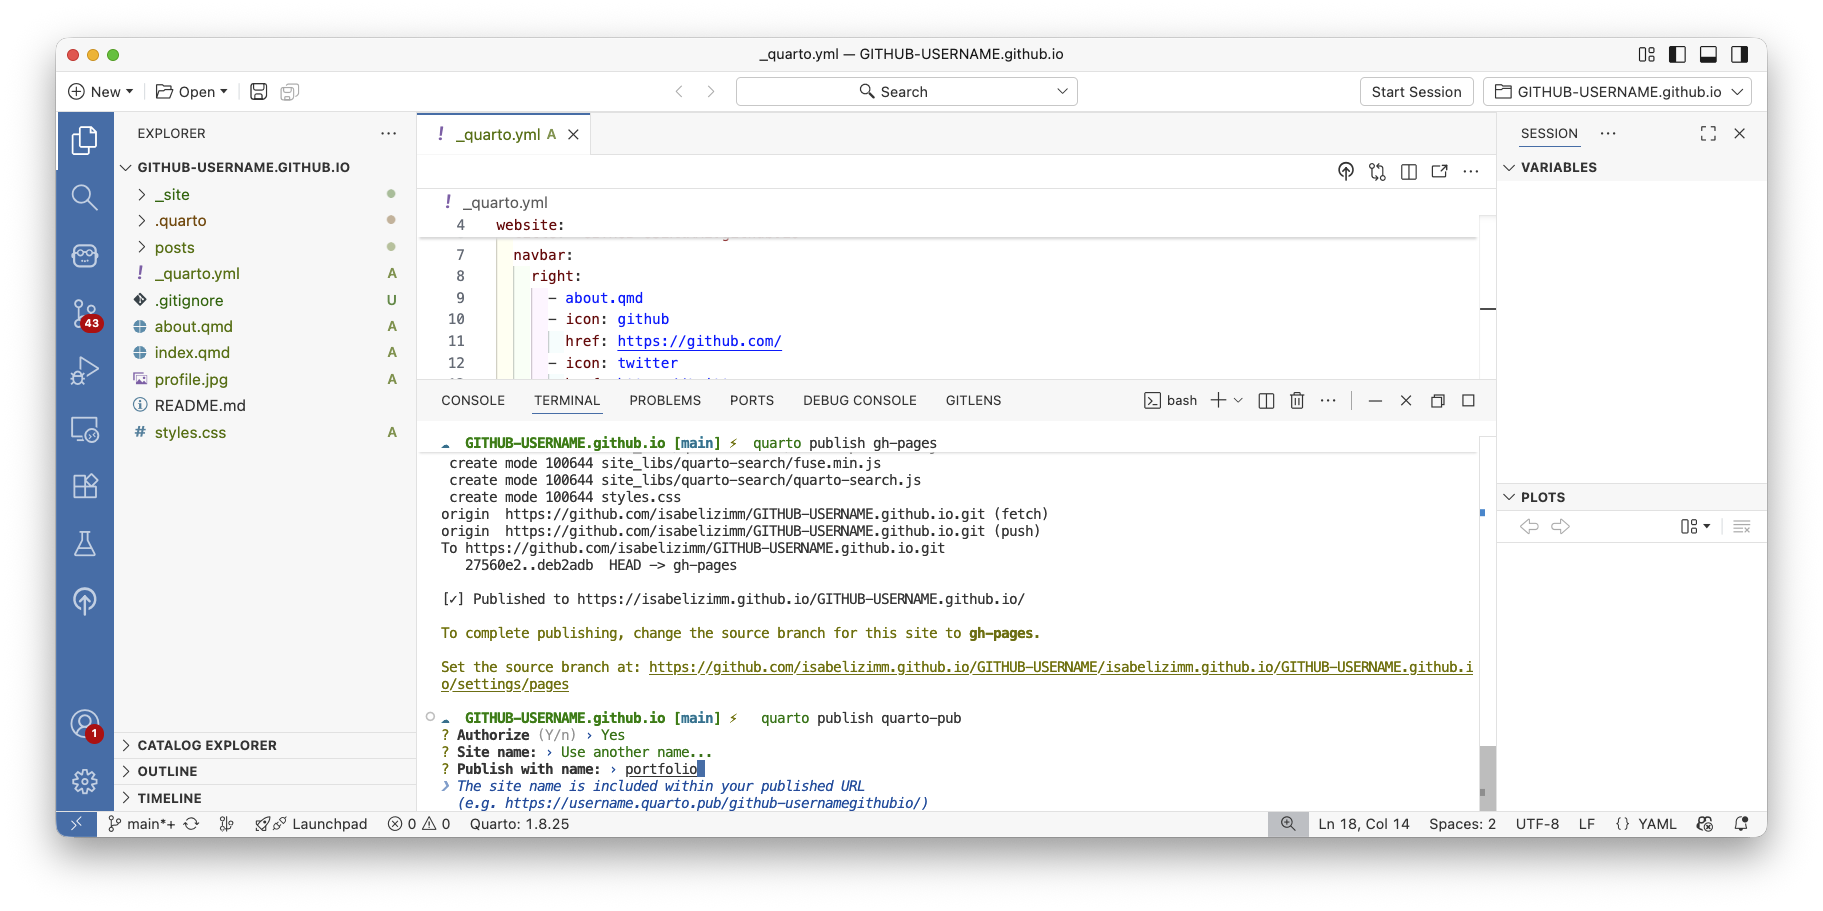
Publish blog, part 1
- In the terminal, run
quarto publish gh-pagesif you’re using GitHub - Run
quarto publish quarto-pubif you’re using Quarto Pub
Publish blog, part 1.5 (Quarto Pub)
- Let Quarto authenticate to Quarto pub
- Choose a reasonable name for your website, like
portfolio
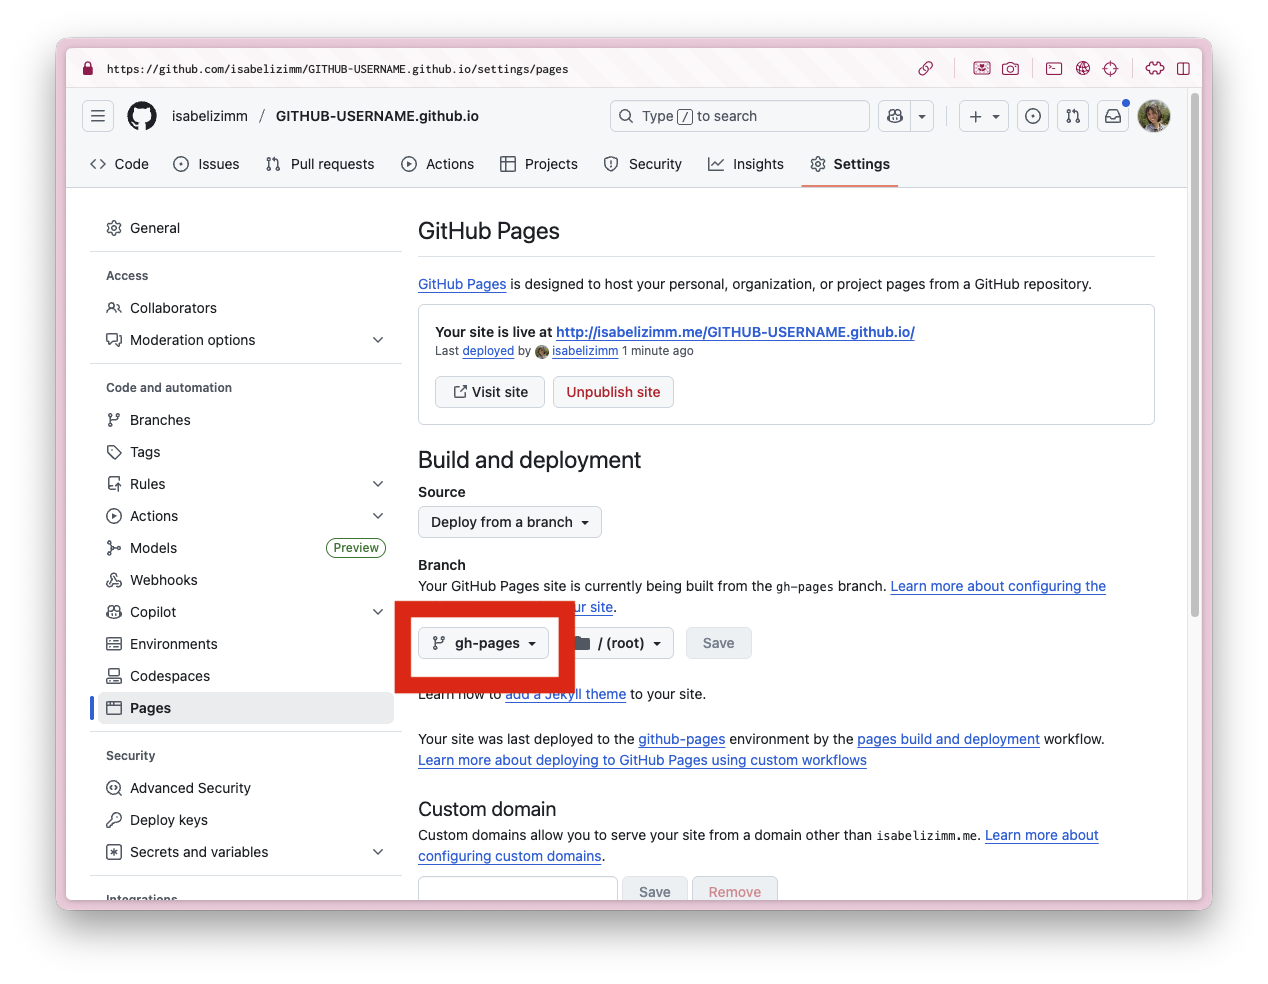
Publish blog, part 2
- Go to your GitHub repo ->
Settings->Pages - Choose
Deploy from branchand set the branch togh-pages
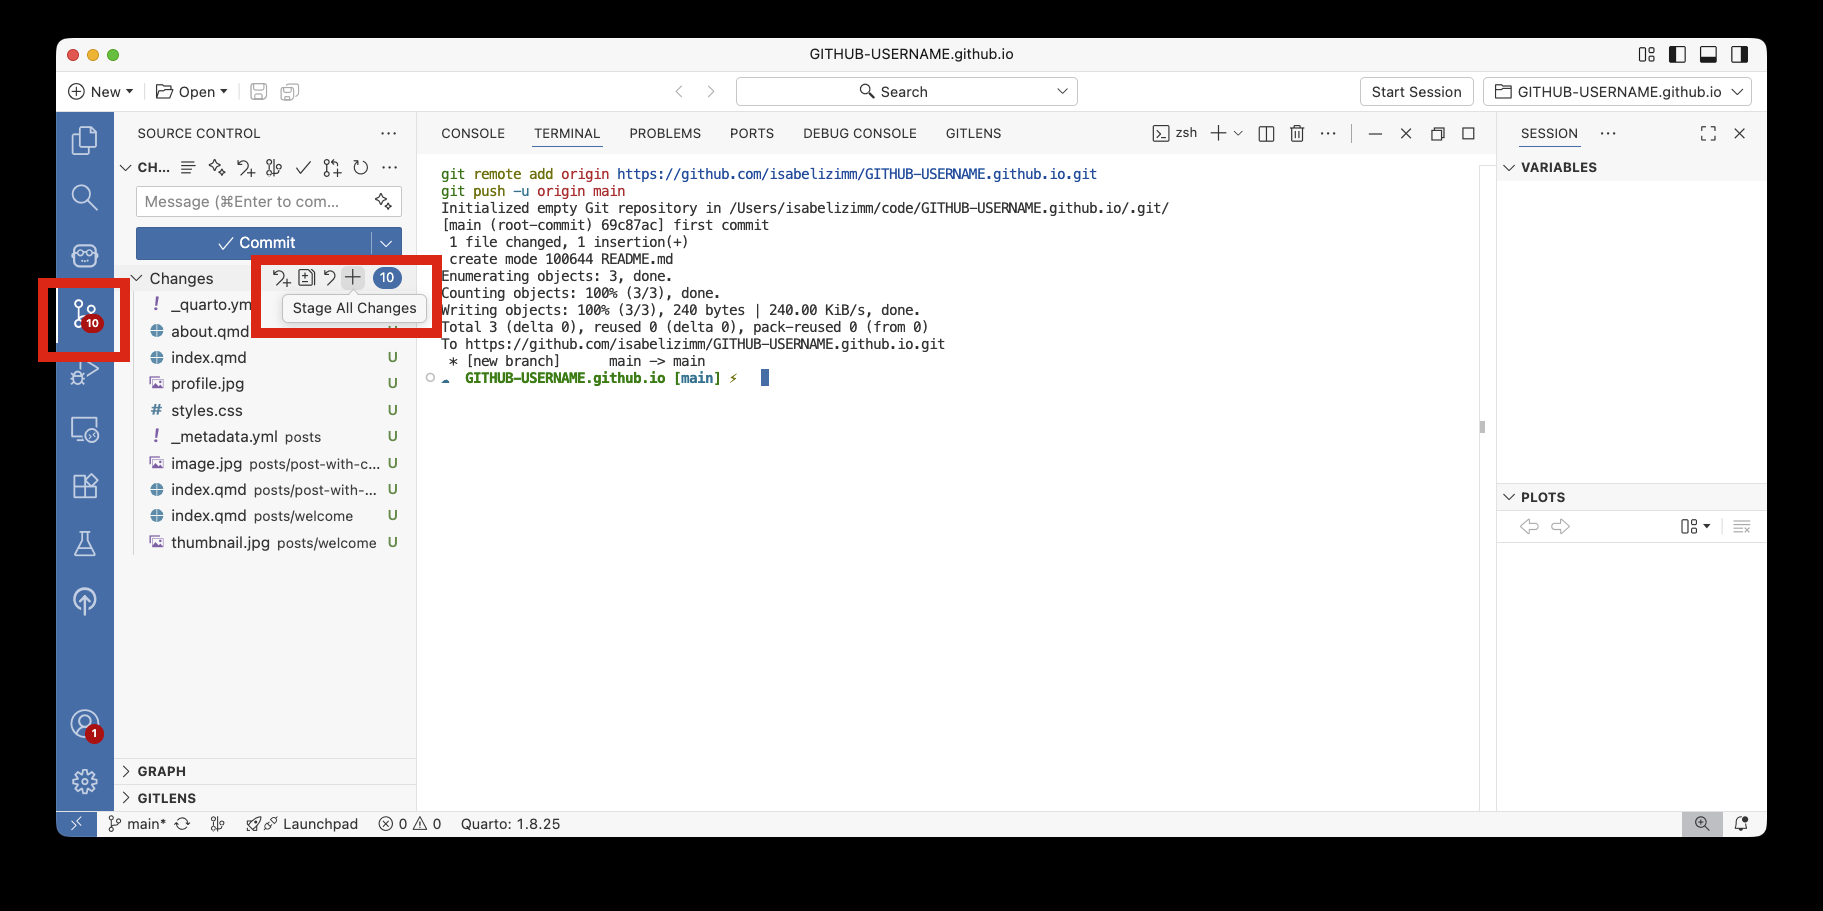
Send your source code to GitHub
- Queue up all your stages to be sent to GitHub
- Add a Commit message and press “Push”